At Oomiak, we’re committed to empowering our team with accessible and intelligent safety solutions.
To make sure you’re all set to start smoothly, here are some simple and quick instructions to help you complete various tasks in Safety Champion.
Getting Started
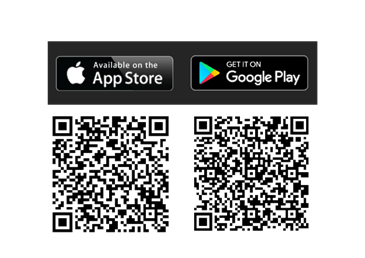
Before we get going, if you haven’t already done so, use the QR code or links below to download the Safety Champion app:
- Google Play Link: https://play.google.com/store/apps/details?id=au.com.safetychampion.scmobile&hl=en_AU&gl=US
- App Store Link: https://apps.apple.com/au/app/safety-champion-software/id1476478938
To log in you’ll need to reset your password. Here’s how:
- Go to https://safetychampion.online
- Click ‘Forgot Password’ and enter your email address to set your password
- Check your inbox (or junk folder) for an email from no-reply@safetychampion.online
- In this email, click ‘Reset your Password’ and choose a secure password.
And now you’re ready to go!
Step 1: Reporting A Hazard
To report a hazard, please use the “REPORT HAZARD” function available in both the app or the desktop browser.
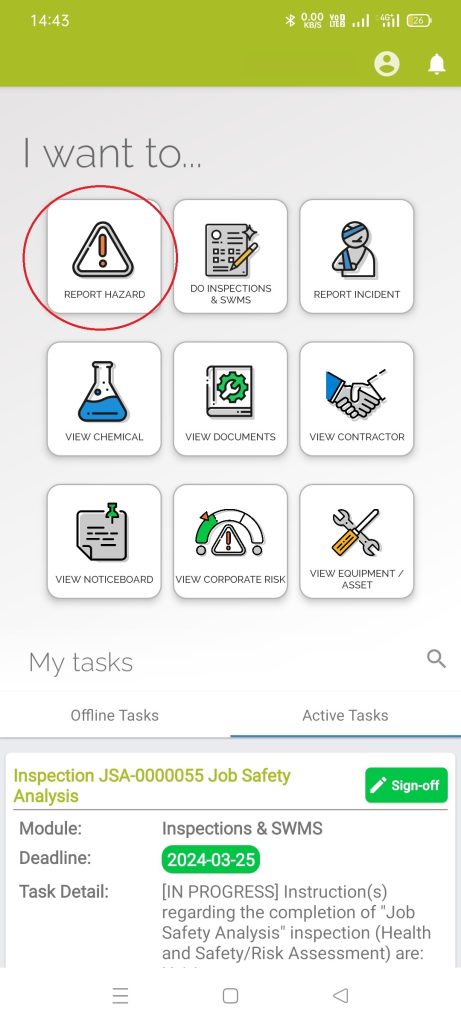
The process is straightforward, and following the prompts will guide you through it.
In the event you don’t come across any hazards today, we still encourage you to engage with the reporting process.
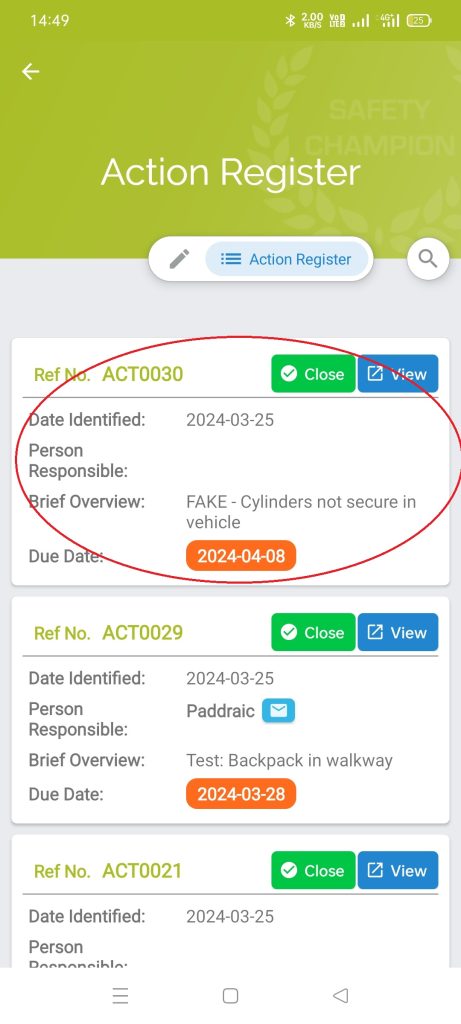
You can submit a hypothetical scenario to demonstrate your understanding. For these instances, please start your description with “FAKE” Brief overview to indicate it’s a practice run.
Please add all important details in this field, this can also include images and other attachments.
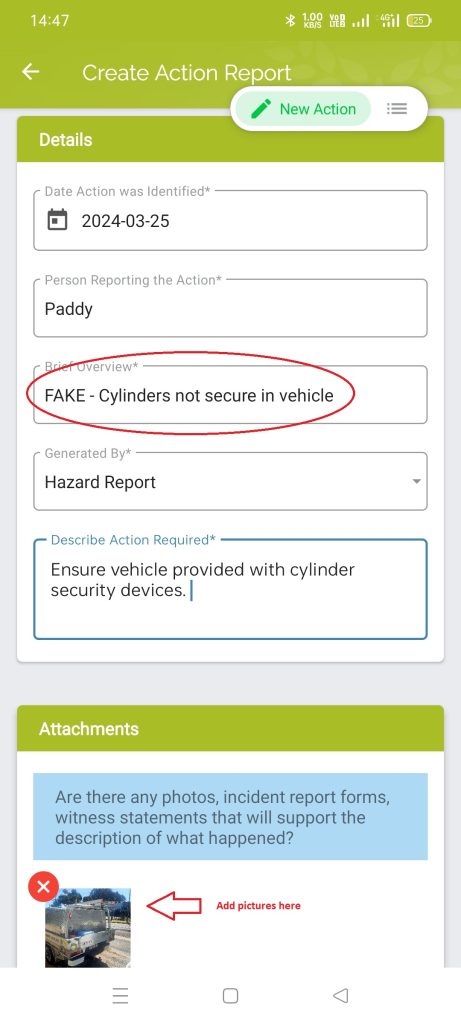
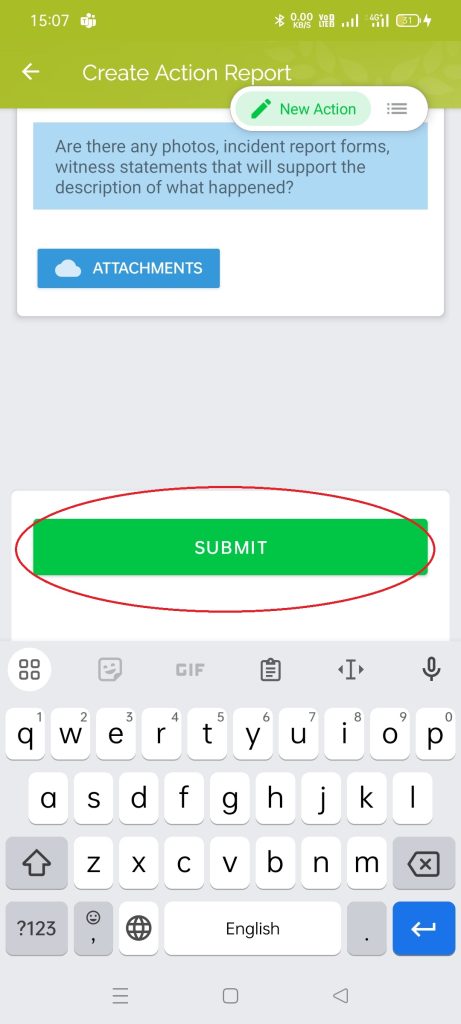
Then click “SUBMIT” to finalise your report.
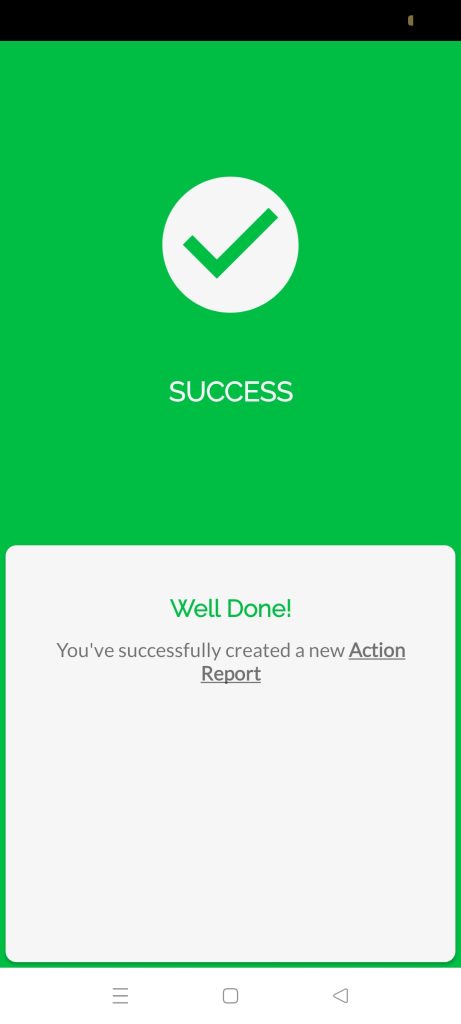
After completing this process, your hazard will end up in the Action Register to be reviewed and managed accordingly.
Step 2: Report Incident
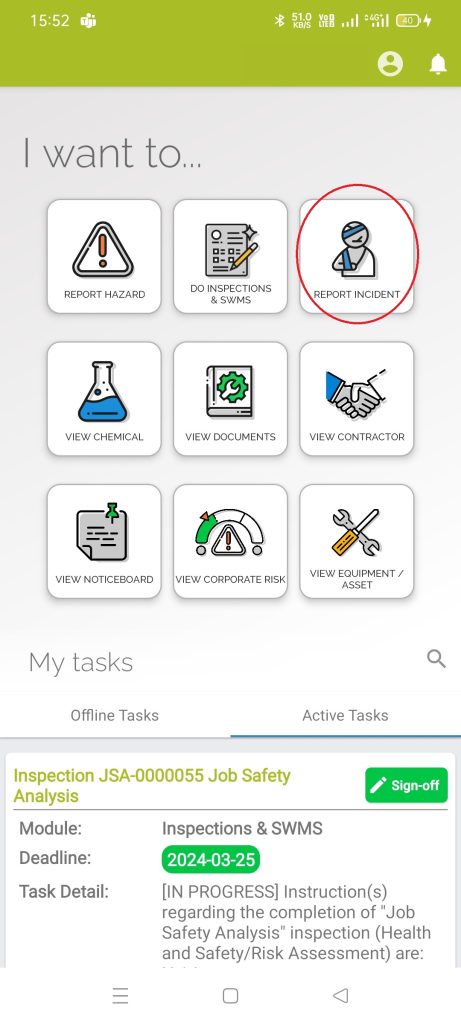
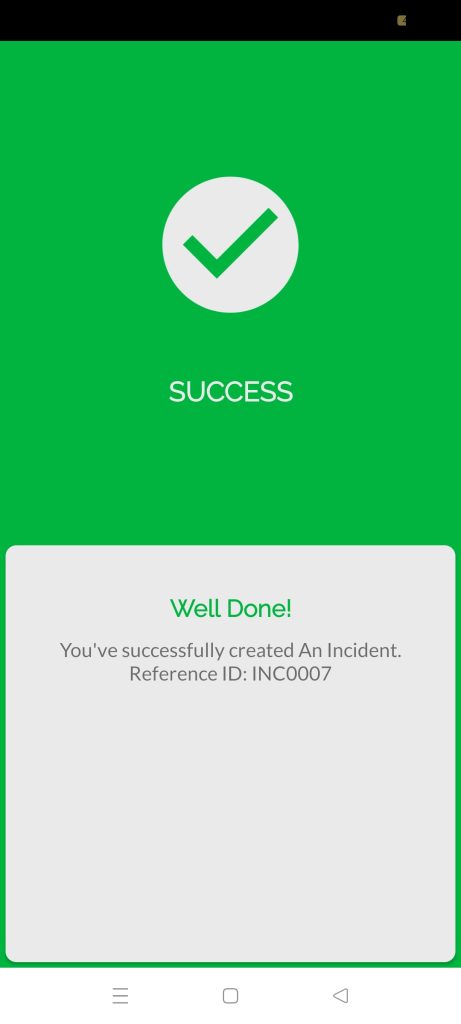
To report an incident, please use the “REPORT INCIDENT” function available in both the app or the desktop browser.
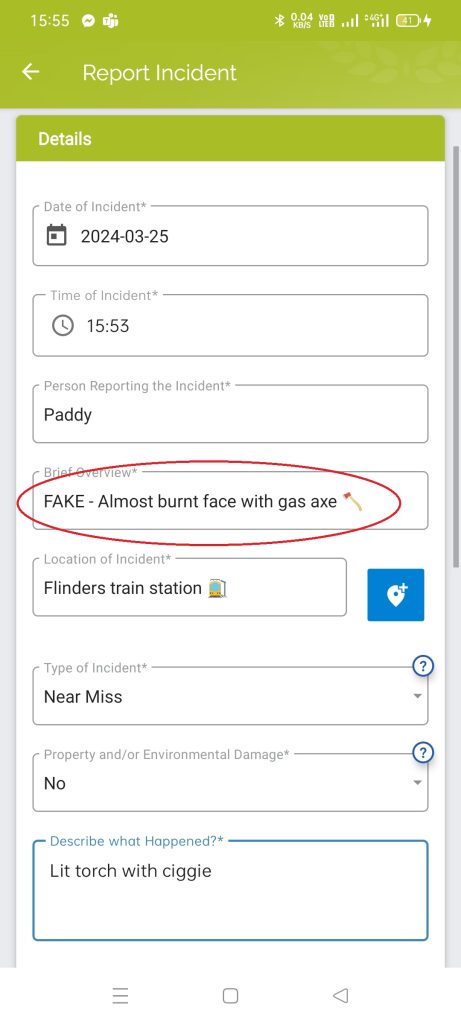
Choose a hypothetical scenario and report it as you normally would, but please begin the Brief Overview section with “FAKE”. This will allow us to identify and remove these test entries after the pilot phase.
However, should you need to report an actual incident, start your overview with “THIS IS NOT A DRILL” – this is crucial, as it will enable us to respond promptly and appropriately to genuine situations.
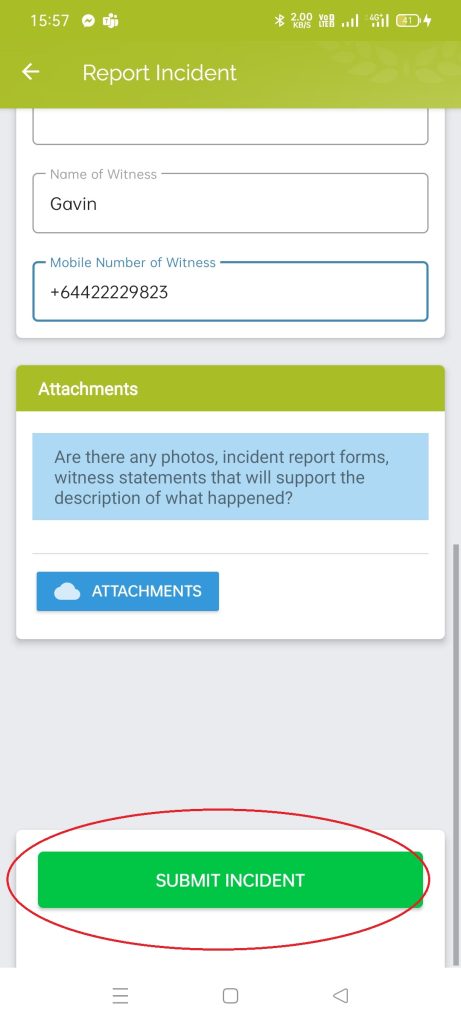
Then click “SUBMIT” to finalise your report.
Step 3: Complete An Inspection – Vehicle
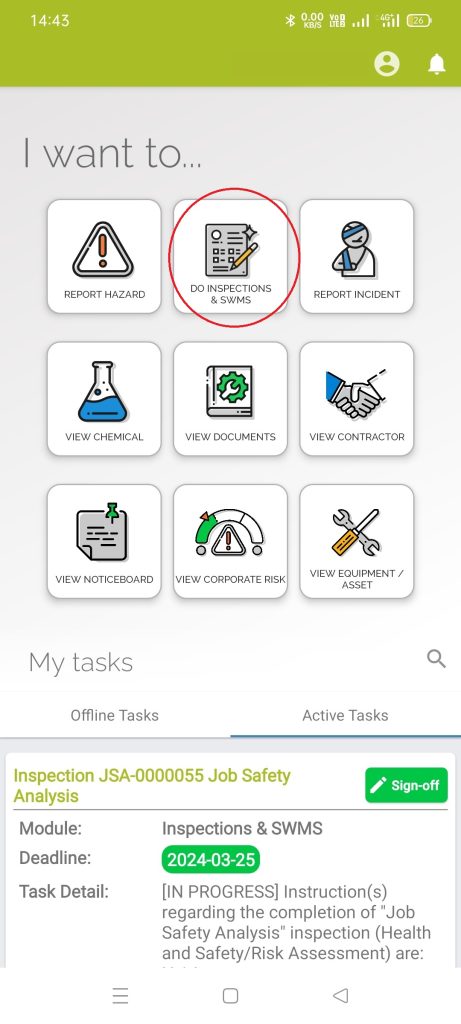
To complete a vehicle inspection, please use the “DO INSPECTIONS & SWMS” function available in both the app or the desktop browser.
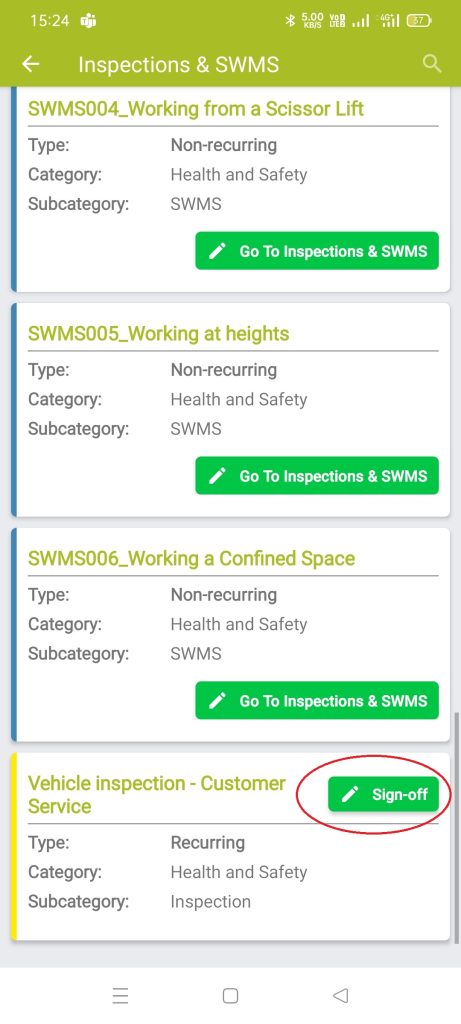
Once in, you must “Sign-off” on the vehicle inspection in order to progress.
Fill in the fields as directed. Once you reach the ‘Comment’ section it is important to list any and all relevant points that you noticed during your vehicle inspection.
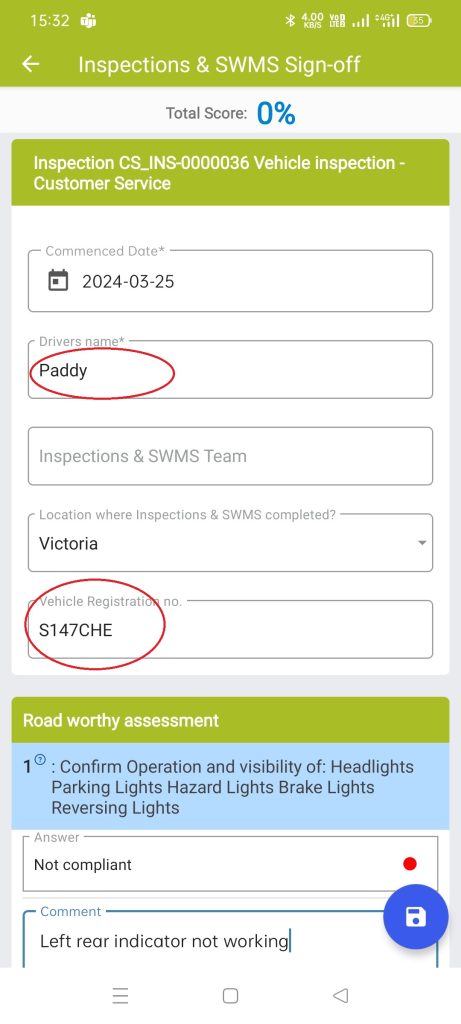
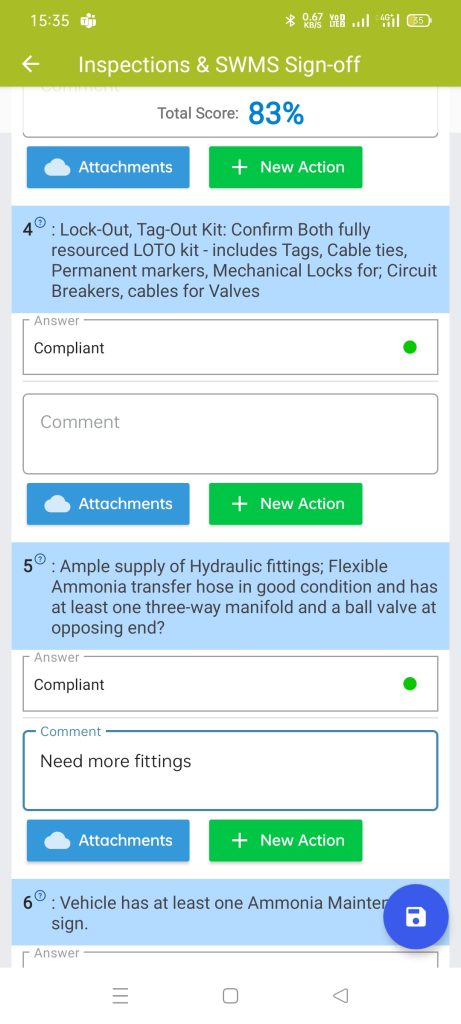
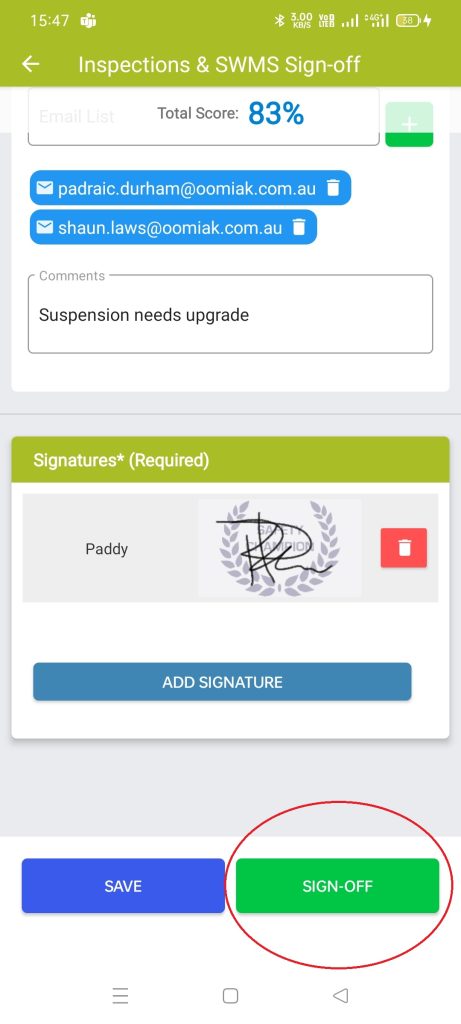
Add any emails if it’s relevant to send to the customer, then finalise your inspection by adding your signature and then clicking the “SIGN OFF” button.
Step 4: Updating Your License
To update your license , please head to the bottom of the page and select the “Sign-off” function available in both the app or the desktop browser. Please ensure you are in the “Active Tasks” tab.
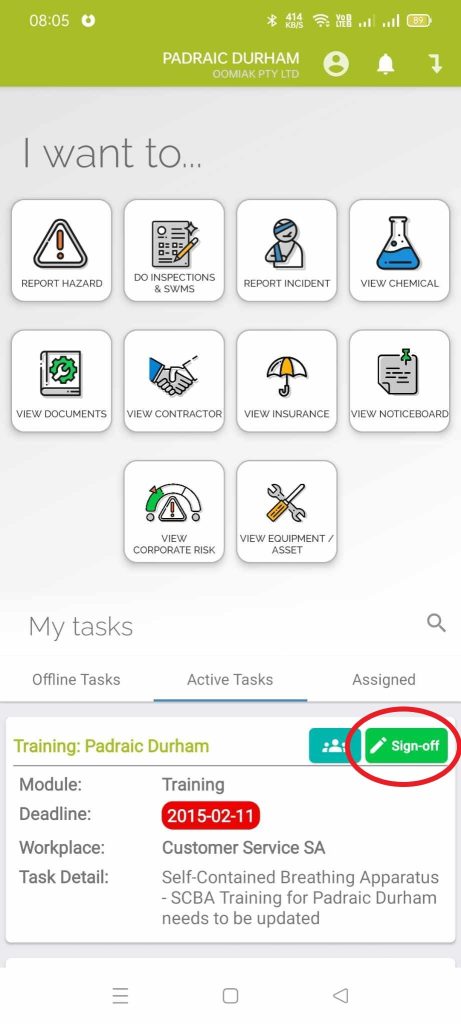
Please fill out the form accordingly, outlining what license is being updated, the number and expiry date – along with any necessary or relevant notes.
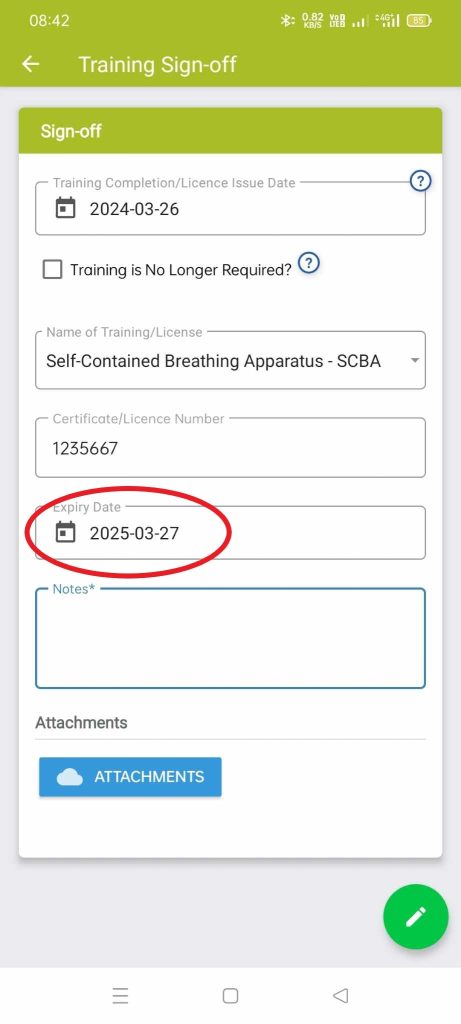
Take a photo of your license or upload a file as an attachment. Then press the “SIGN-OFF” button to complete this action.
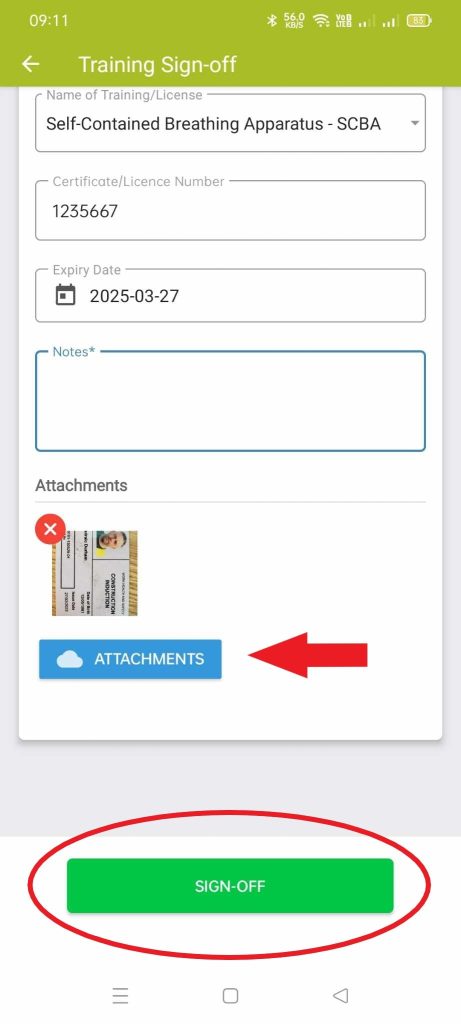
And then you have successfully updated your license, please complete this for any expiring license that you use.
Step 5: Complete An Inspection – SWMS
To complete a SWMS inspection, please use the “DO INSPECTIONS & SWMS” function available in both the app or the desktop browser.
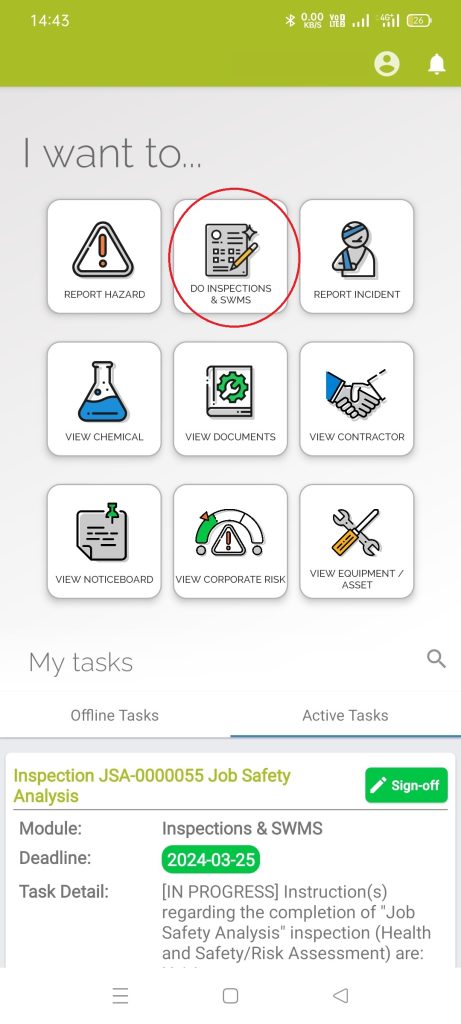
From here, please select the SWMS that is relevant to your current task at hand.
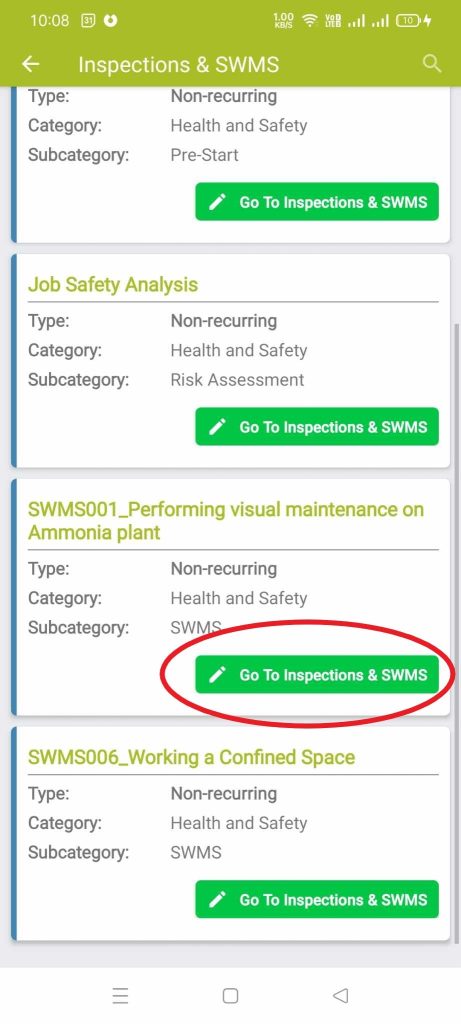
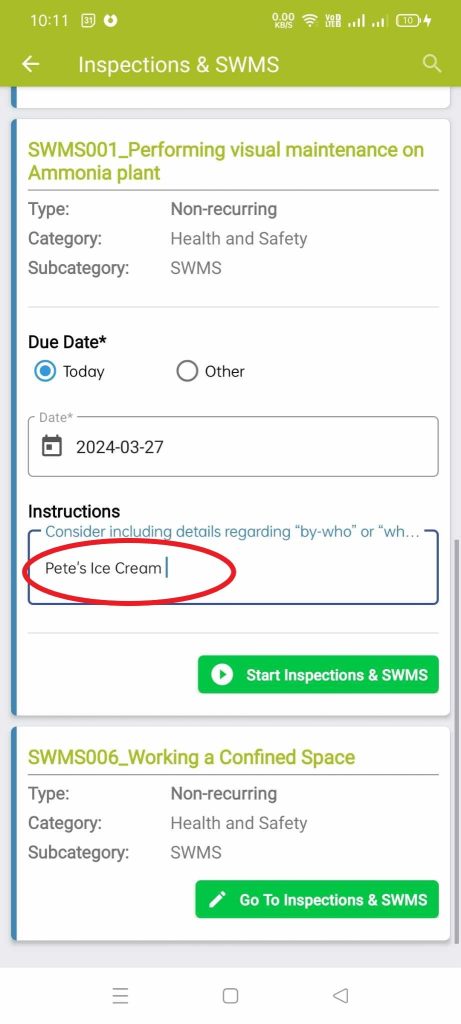
Under the “Instructions” tab, fill in the site in which the SWMS will be actioned in.
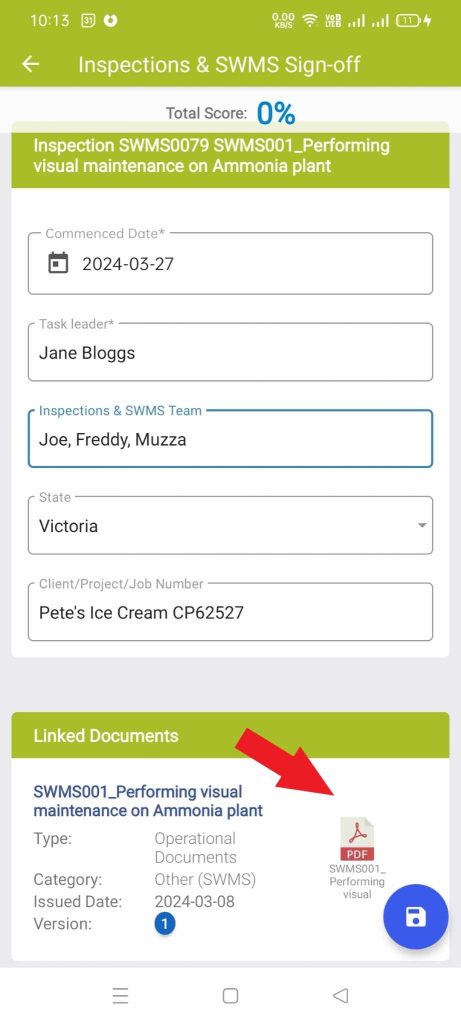
Fill out the remainder of the form, including information like the date, task leader, state and more. When you reach the “Linked Documents” section please download the PDF version of the SWMS as well as any other associated documents within this section and read thoroughly.
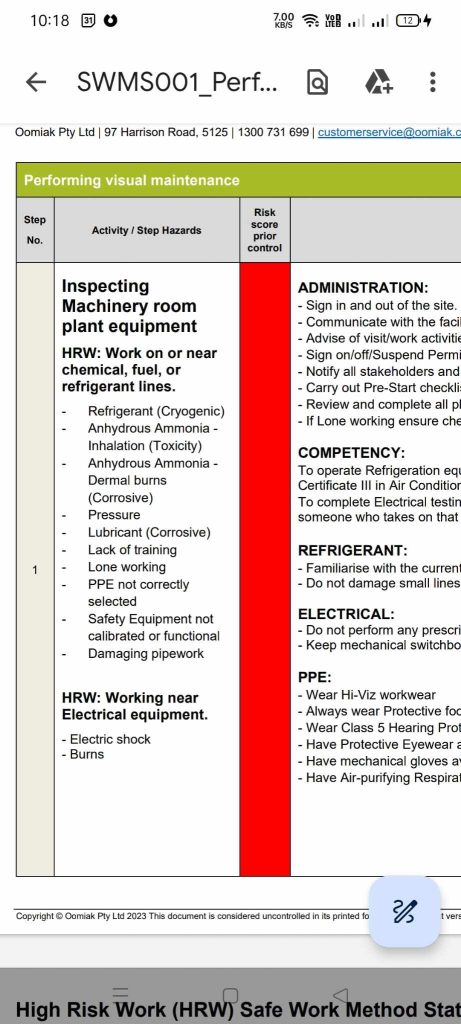
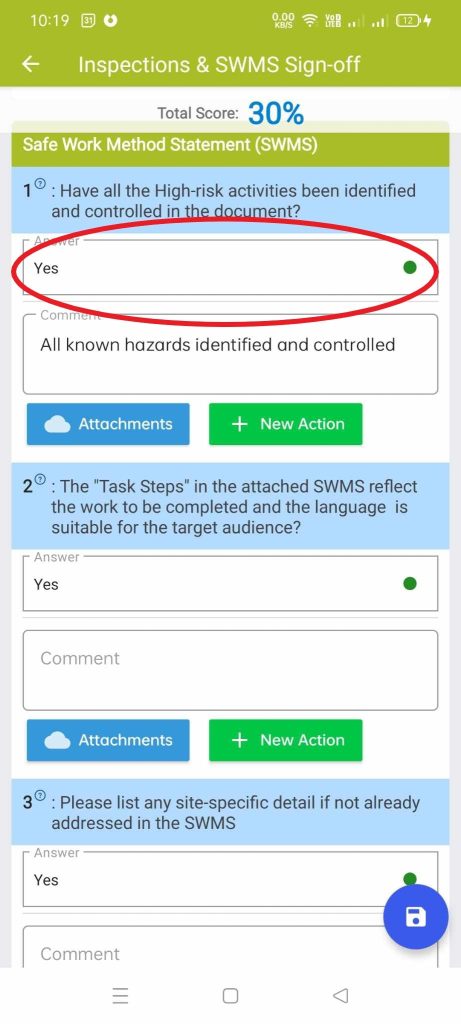
After you have uploaded your SWMS PDF, it is important to accurately answer the following questions about said SWMS.
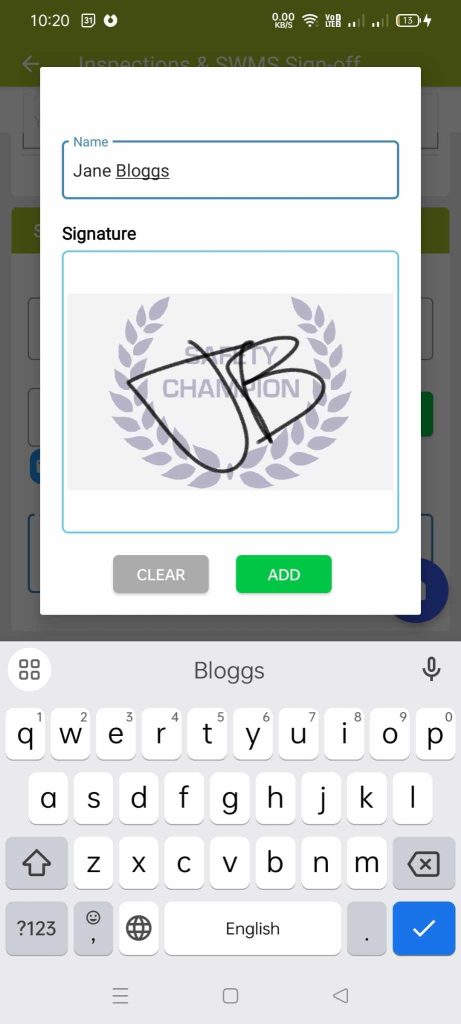
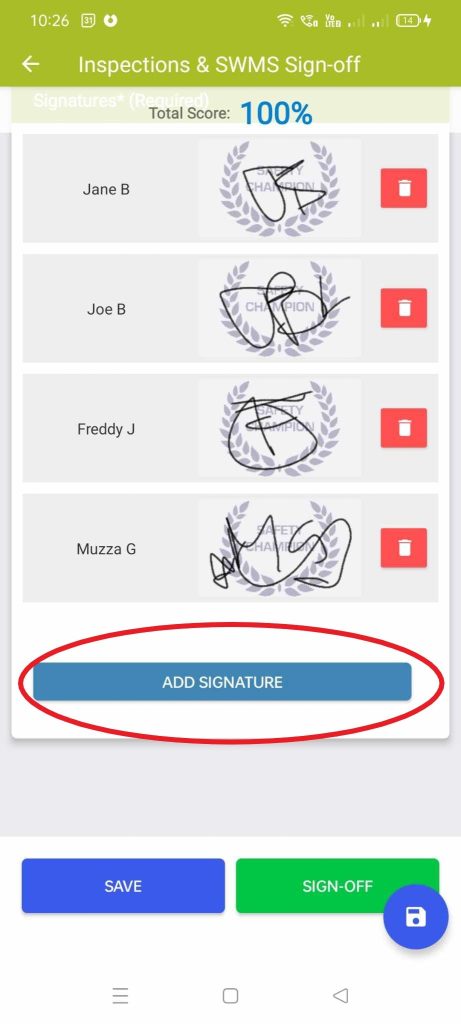
To add more signatures to a form select the “ADD SIGNATURE” function – it’s important that all relevant parties sign the SWMS form.
Once all signatures have been added, select the “SIGN-OFF” function to finalise and complete this process.
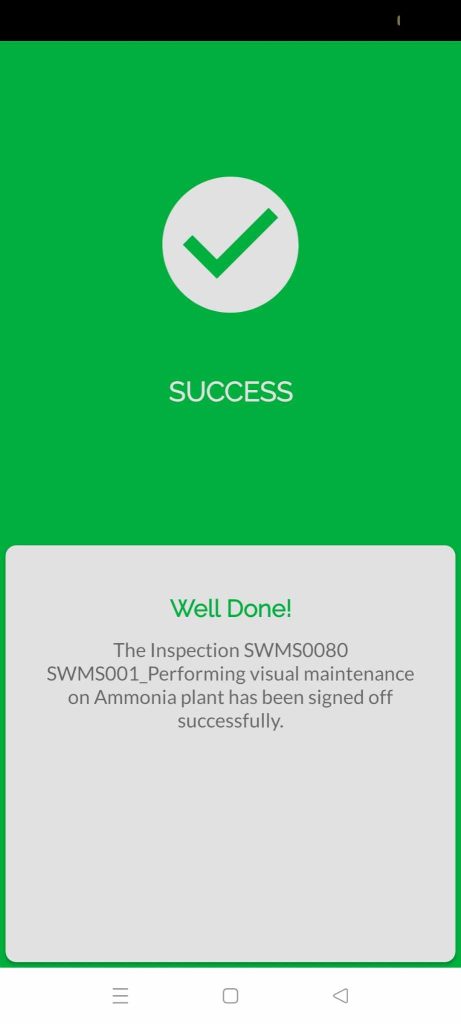
After completing this process, a PDF document will be generated and this can then be distributed to any other relevant party both internal and external.
Step 6: Air Purifying Respirator Documentation
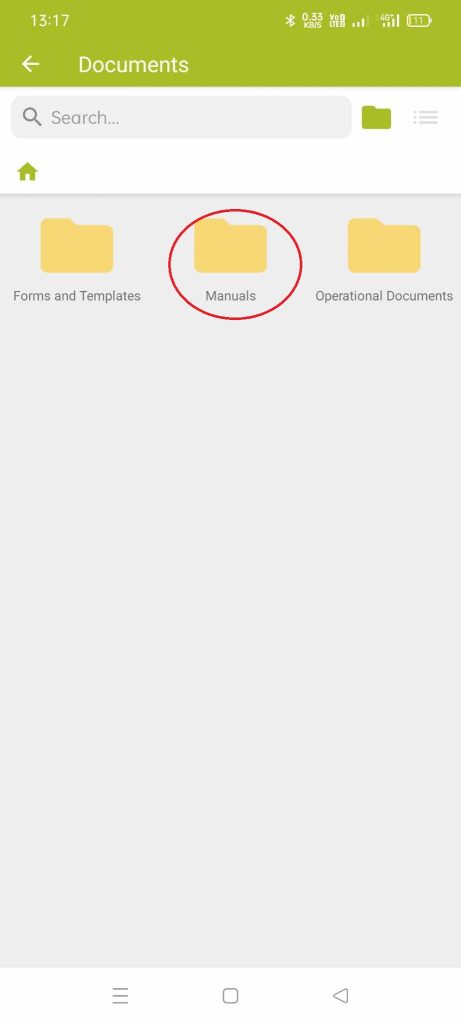
To view the documentation about Air Purifying Respirators , please use the “VIEW DOCUMENTS” function available in both the app or the desktop browser.
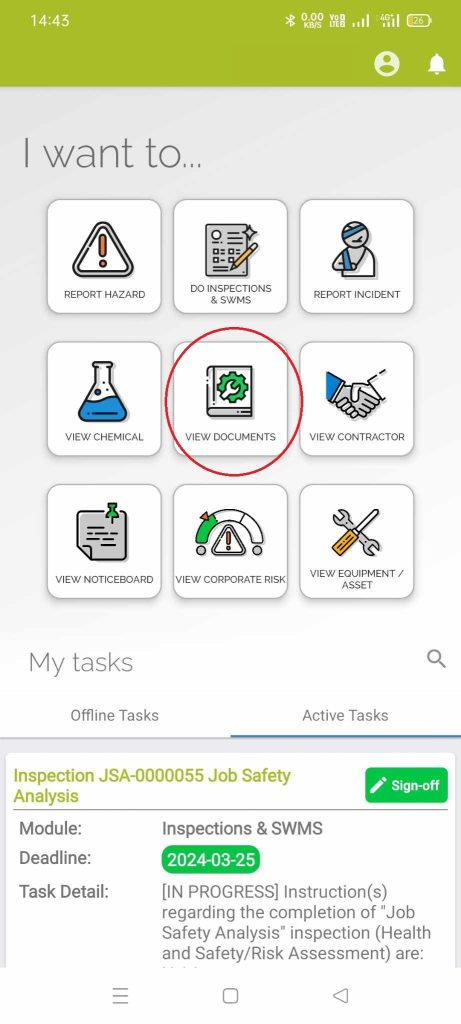
Then select the “Manuals” folder.
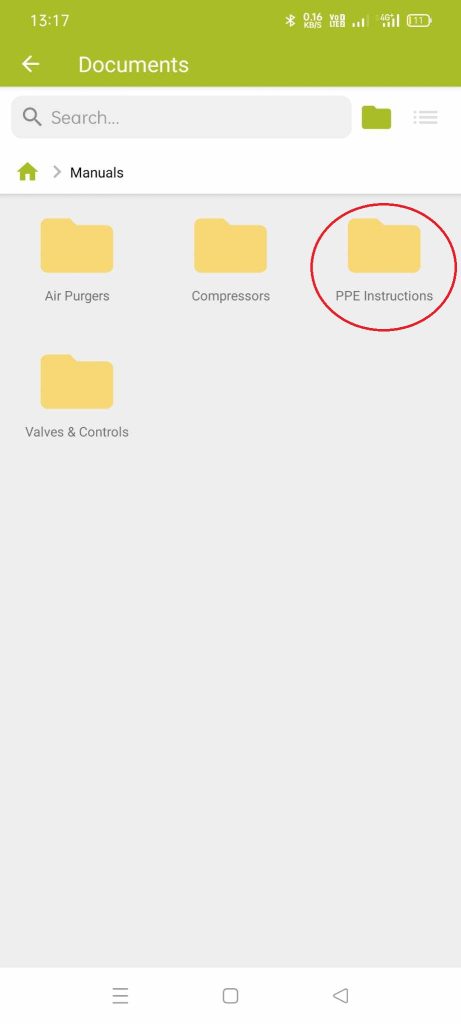
Then select the “PPE Instructions” folder.
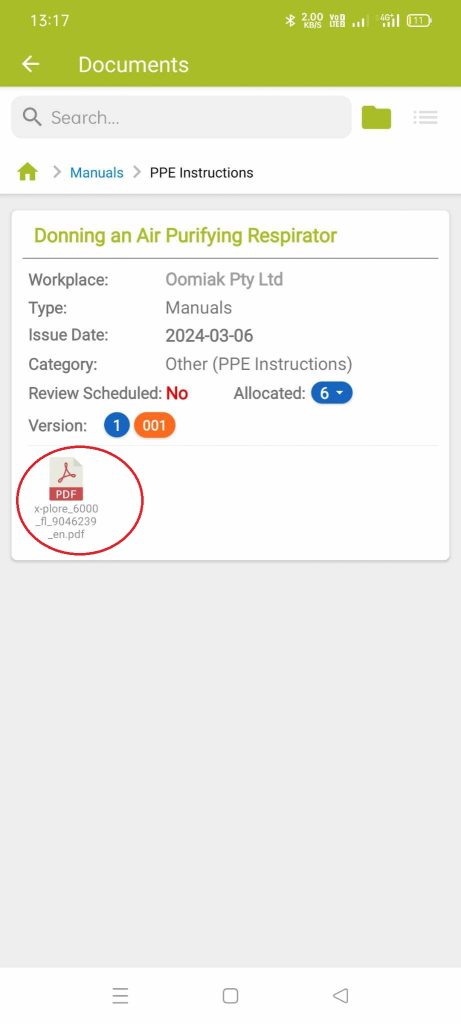
And to complete the process, select the PDF file to start your download.
Step 7: SDS
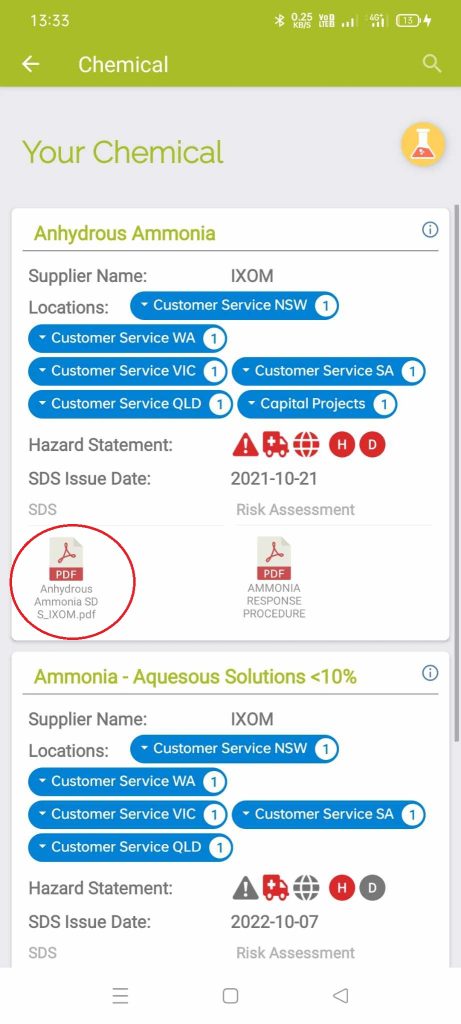
To view an SDS , please use the “VIEW CHEMICAL” function available in both the app or the desktop browser.
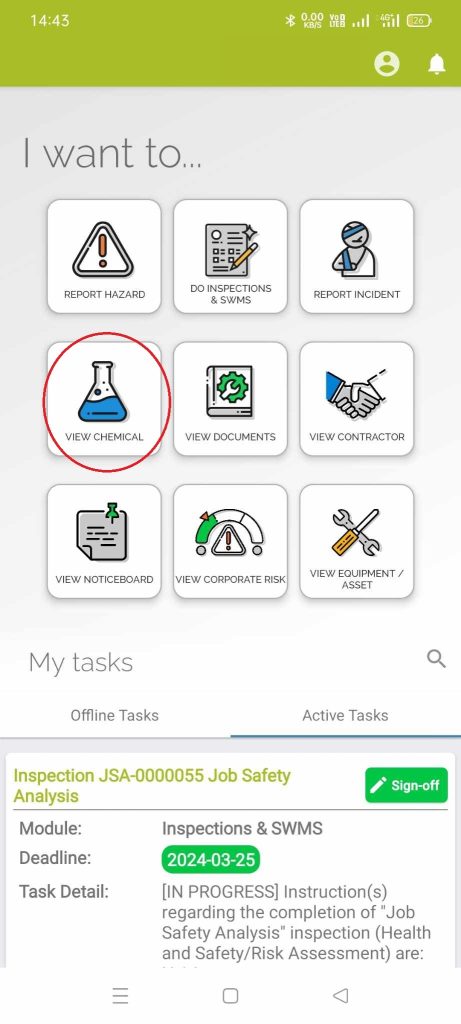
Select the PDF file of the SDS you need, to start your download.
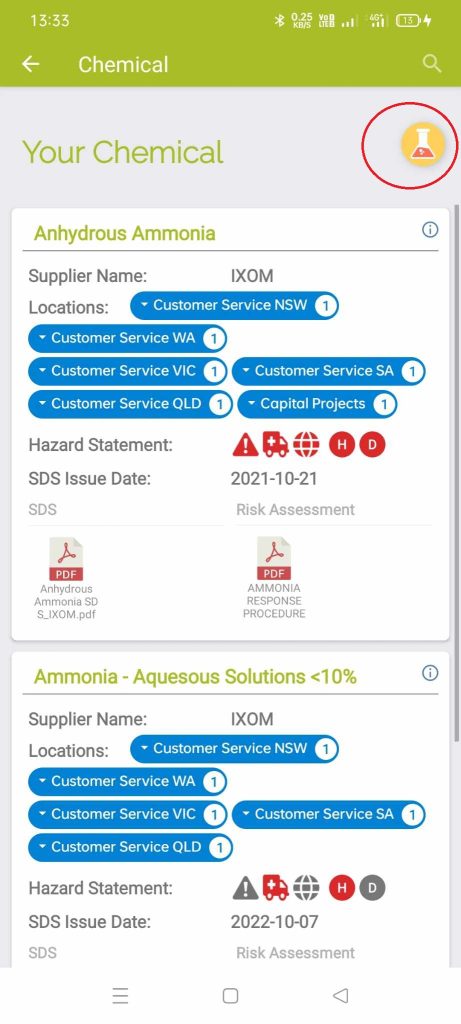
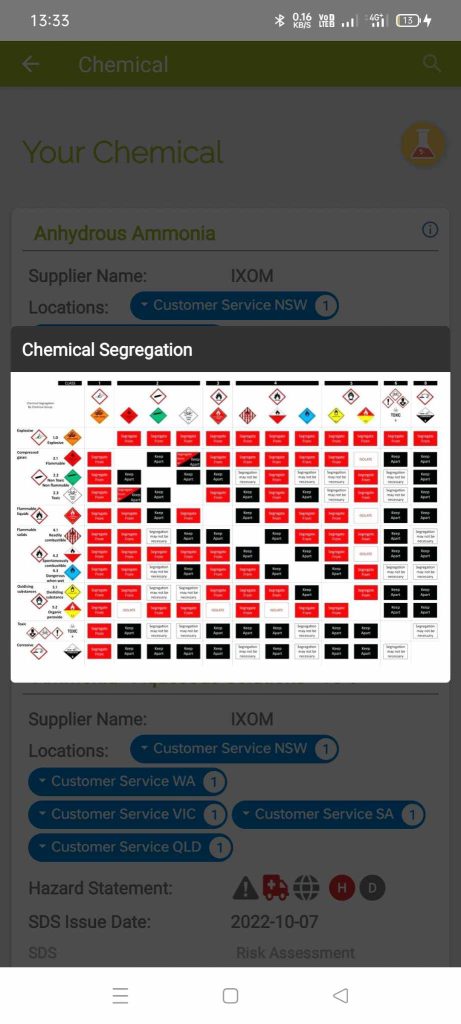
To view the Chemical Segregation table, select the beaker icon in the top right corner of the screen.
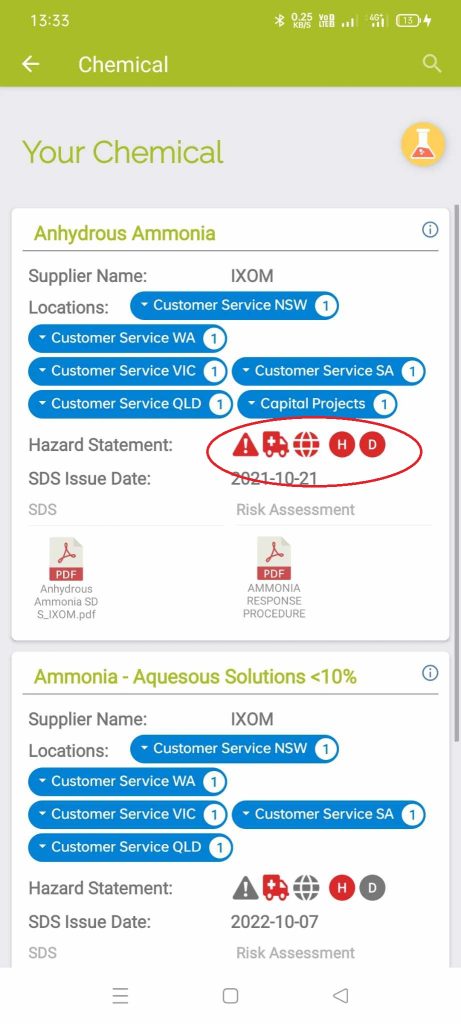
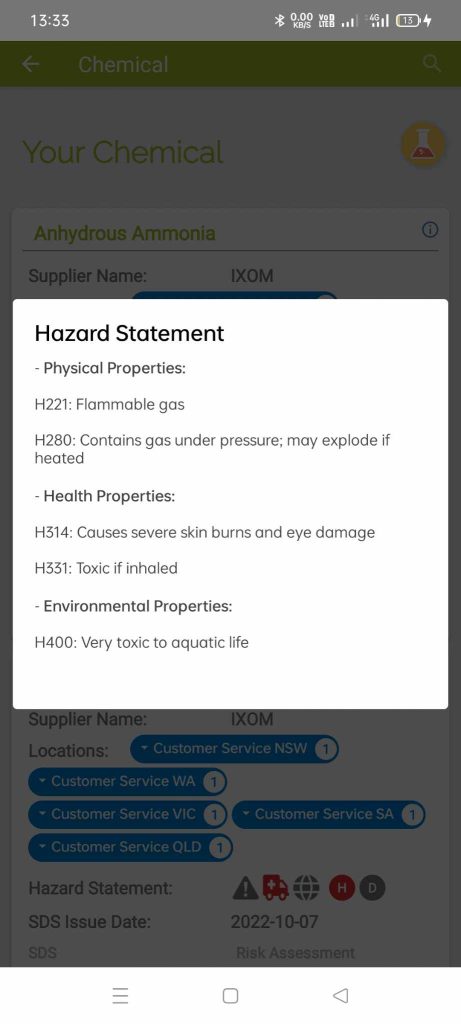
Similarly, to get a breakdown of the Hazard Statement, select the icons listed after “Hazard Statement:” to view.
Have Your Say
Your opinion matters to us, that’s why we created the Safety Champion – Evaluation to see how successful this was to you.
The process won’t take long so, have your say here!
For any further assistance please either get in touch with your manager or call 1300 731 699.
